

Facebook released Facebook Reels in its flagship mobile application on iOS and Android in the U.S. Our guide will show you how to create Facebook Reels within the Facebook mobile app.
Note: These screenshots were captured in the Facebook app on iOS.
There are two ways to start creating a Reel. First, you can tap “Reel” under “What’s on your mind?” at the top of your Facebook News Feed.

Or, as you’re watching Facebook Reels, you can create a Reel by tapping the camera icon in the top-right corner of the screen.
You can capture a new video clip by tapping the capture button at the bottom of the screen, or import a video from your device’s camera roll by tapping the camera roll icon in the bottom-left corner of the screen.

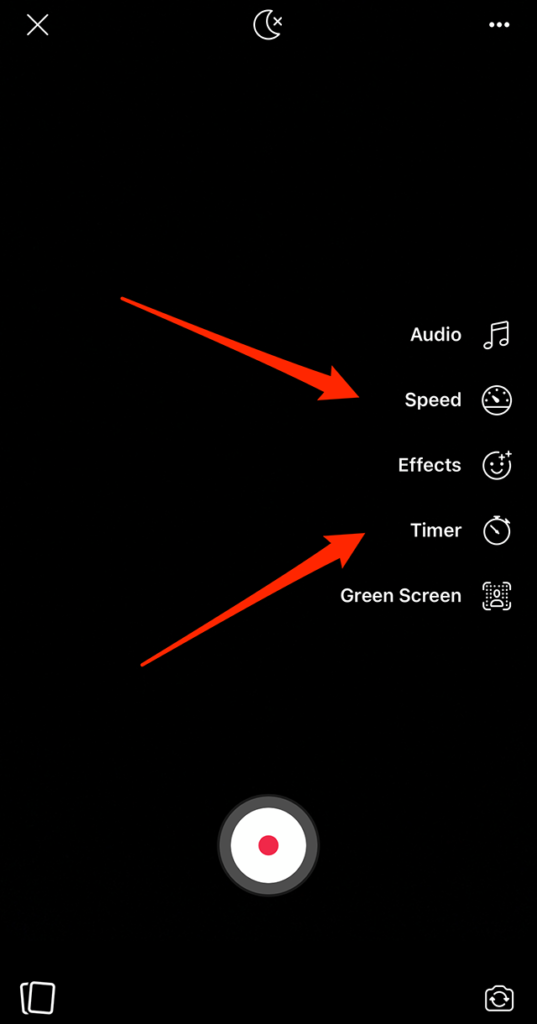
If you decide to record a new video, you can customize your recording in a variety of ways using the buttons on the right side of the screen. These buttons, from top to bottom, are “Audio” (add sound effects or music to your Reel), “Speed” (record a Reel in slow or fast motion), “Effects” (add a visual effect to your Reel), “Timer” (record a Reel using a countdown timer and record a Reel of a pre-determined length) and “Green Screen” (add a “green screen” background to your Reel).
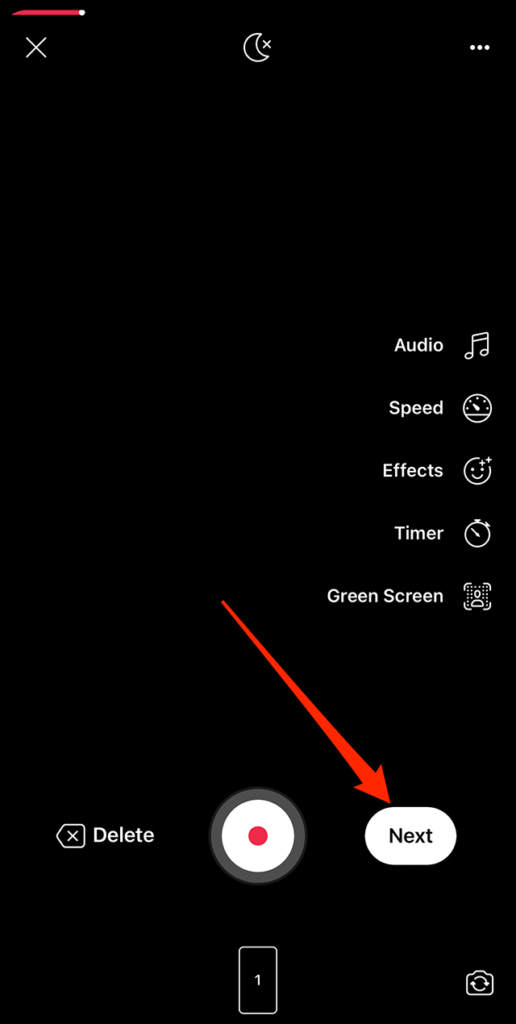
If you decide to record one or more clips for your Reel, tap “Next” near the bottom-right corner of the screen when you’re done recording.
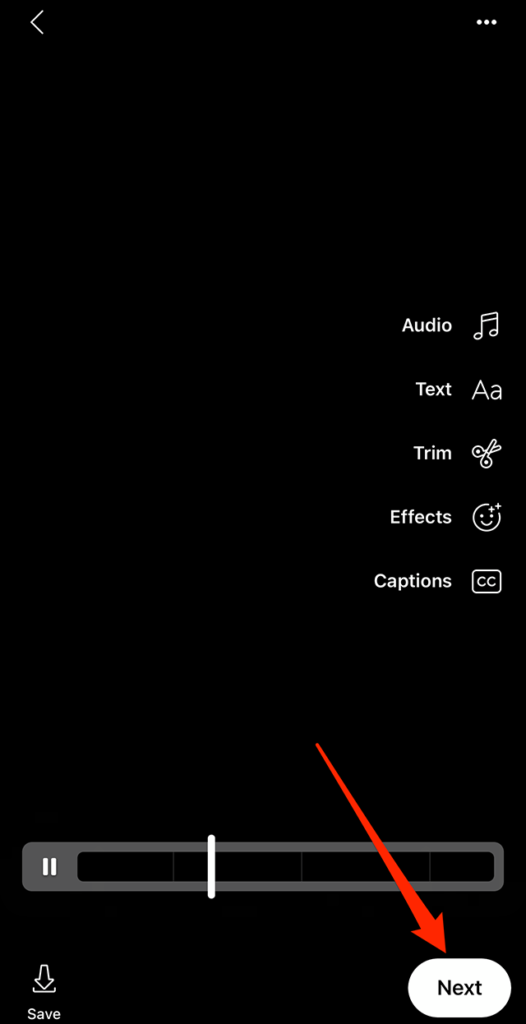
Once you import or capture a video in Reels, you can edit your Reel using buttons on the right side of the screen. These buttons, from top to bottom, are “Audio” (add sound effects or music to your Reel), “Text” (type text that will appear on top of your Reel), “Trim” (trim the beginning and/or ending of your Reel), “Effects” (add a visual effect to your Reel) and “Captions” (add closed captioning to your Reel).

Once you’re done capturing, importing and/or editing your Reel, tap “Next” in the bottom-right corner of the screen.
Now, you can write a description for your Reel, as well as set its privacy setting. By default, Reels are set to be public for creators who are 18 and older. However, you can change this setting so your Reel is only viewable by your friends or certain friends. When you’re ready to share your Reel, tap the “Share Reel” button at the bottom of the screen.


